Last updated on September 28th, 2021 at 06:23 pm
Most computer users use pictures as desktop backgrounds. But, some of them are not aware that they can also use solid colours and slideshow as desktop backgrounds of their desktops, laptops, or tablets. By using a slideshow, you want to set two or more pictures as desktop backgrounds so that they can alternate themselves. Just follow the following steps and it’s really simple. Make sure that you apply these steps in Windows 10 Operating System. I’m very sure that after reading this, you will be able to set a slideshow as a desktop background.
Setting a slideshow as desktop background in Windows 10: (first option)
1. Click the Start menu.
2. Then click on Settings and open Personalization

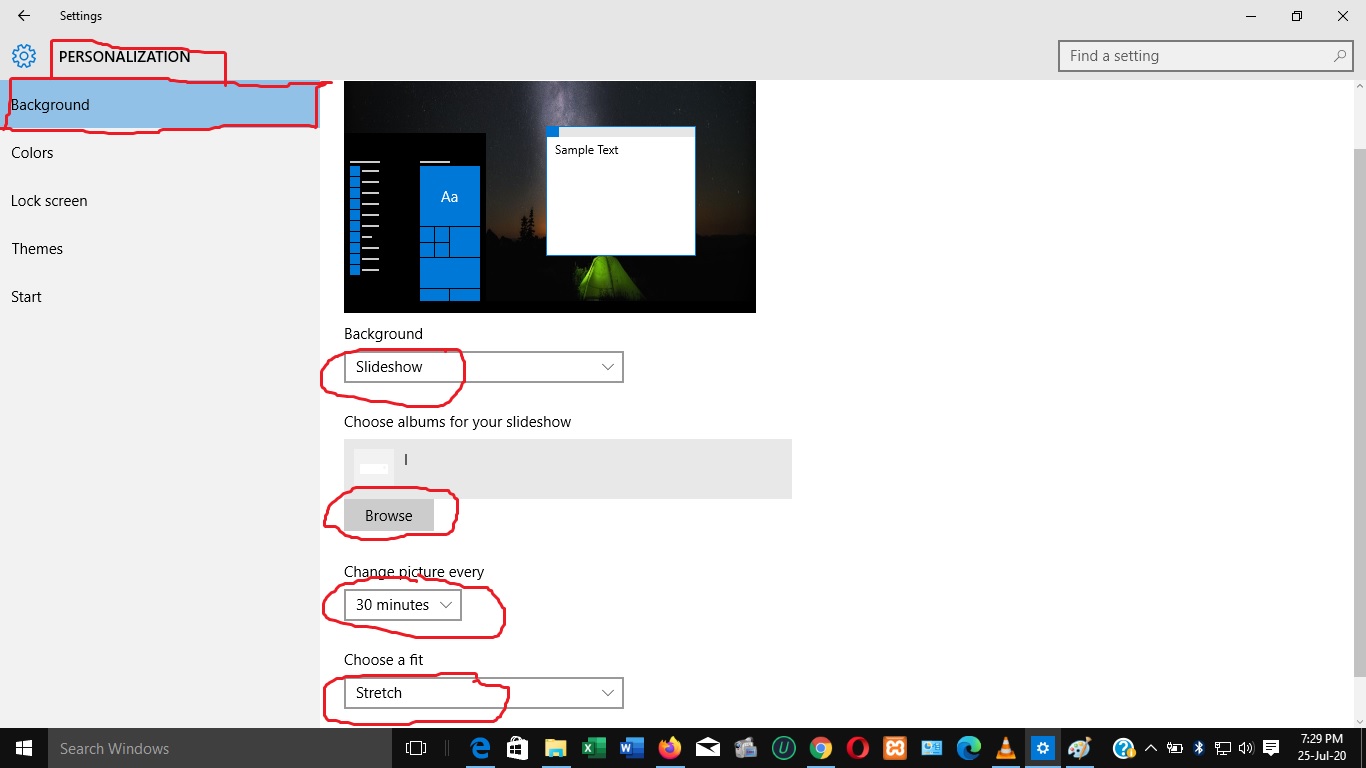
3. Under Personalization, click on Background. In the case (under ‘Background’), select ‘Slideshow’. The options will appear underneath. Click on ‘Browse’ to choose the folder that contains all the pictures that you want to use as a slideshow. In this image, you see the letter ‘I’. It is the name of the folder that contains the pictures I want to use as a slideshow.

After doing that you will choose the time it takes one picture to alternate with another. It can be one minute, or 10, or 30 minutes. It can also be hours or days. Just choose 1 minute and wait to see the changes. Choosing the fit means how your pictures will fit on the screen. Make a choice of yours and then close to see the changes.
Setting a slideshow as desktop background in Windows 10: (second option)
1. Go on your desktop and “right-click” on an empty space.

2. Among the options that appear, choose ‘personalize”.

3. Then you will arrive in ‘Settings’, on ‘Background’, under ‘Personalization’. Then repeat the same steps of the first option as mentioned above. (From step 3).
I think this guide has helped you. Now, you can set a slideshow as your desktop background.
Leave a comment