Last updated on June 18th, 2023 at 05:21 pm
Gmail account is one of the most popular email services on the Internet. It is a free email service that was developed by Google. Gmail offers online free storage of 15 Gigabytes. This means that you can use the storage to save different files such as documents, pictures, music, and videos. This guide will help you to create or set up a Google/Gmail account without anyone’s help. It is just simple if you follow all the steps in this guide.
STEP 1: a) Open your browser (Google Chrome, Mozilla Firefox, Microsoft Edge, Opera,…), and type http://www.gmail.com in the address bar and then click on the search icon or press Enter. On the displayed page, scroll down to choose the language and then click on Create account.
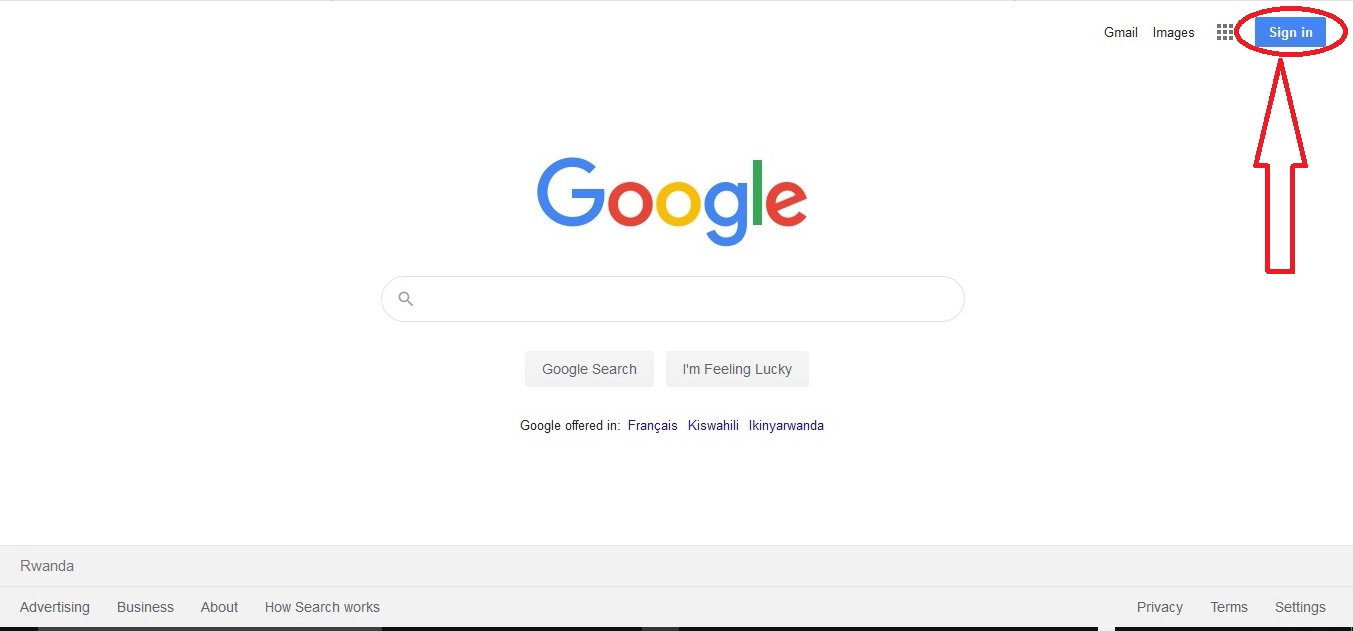
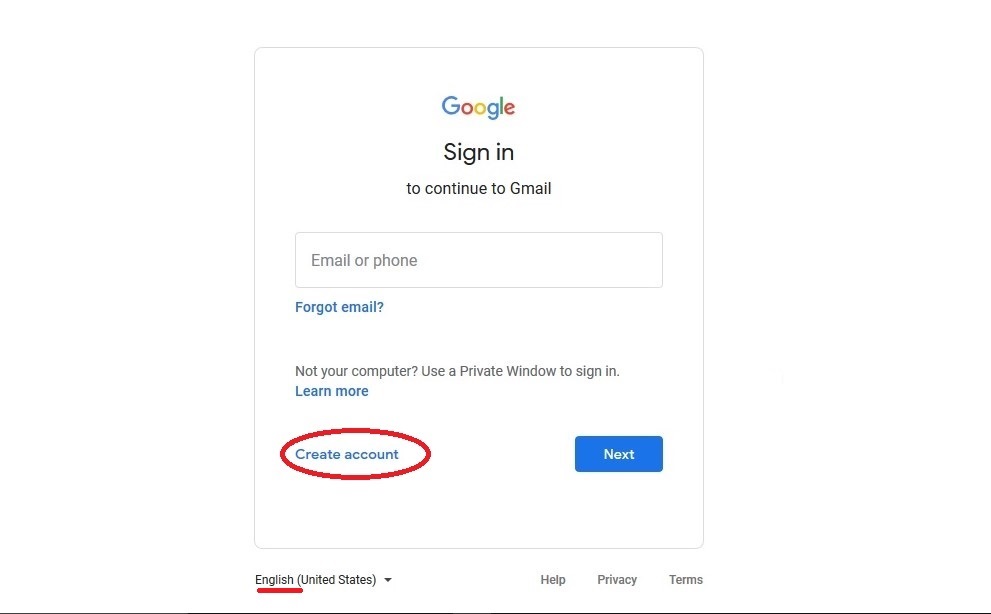 b) You can also access the page by typing http://www.google.com in the address bar of your browser and then click on the search icon or press Enter.
 After pressing “Enter” or clicking the arrow, you will arrive at the page as shown below. Click on Sign in as shown in this picture, and you will be redirected to the same page as shown in the first picture.
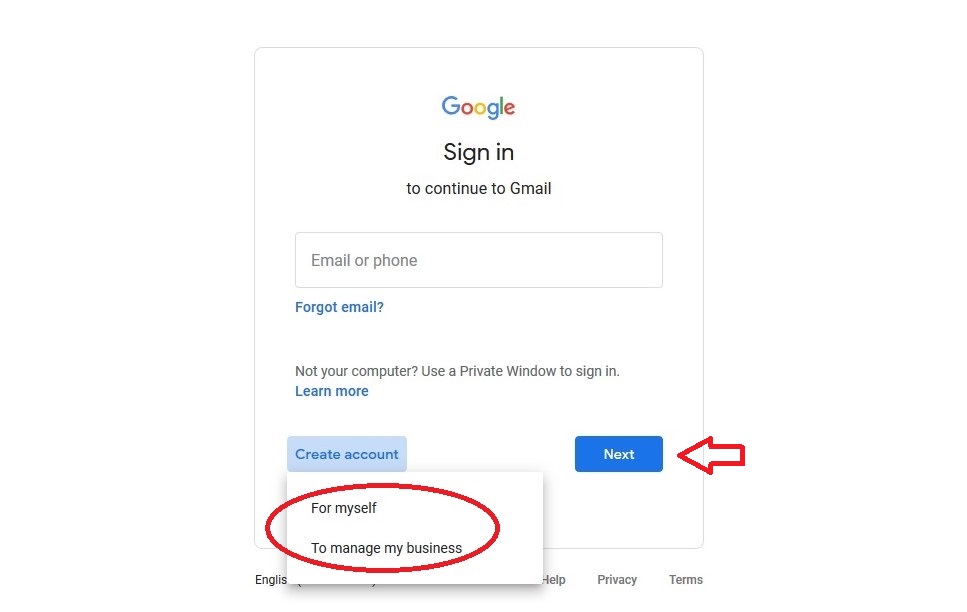
 STEP 2: The next step will be to click on Create account whereby you will be asked to choose either an email for yourself or for managing your business. The choice will be yours depending on the use of your email. After choosing, you will click on Next to go to the next page.
 STEP 3: a) The sign-up form will be displayed. Fill in with your first name and last name. In the username place, @ gmail.com is provided, therefore write only the first part. You are advised to use the username/email which is related to your names. After doing this, choose the password that you will use while signing in to your account. Remember that a strong password must at least have eight characters that contain capital letters, smaller letters, numbers, and symbols like @,#,%,!, and so on. While typing a password, the characters change into dots. This happens for the purpose of hiding it from other people who should be sitting or standing behind you. You will need to re-enter or confirm the password and if you mismatch them, they will tell you that the passwords do not match.
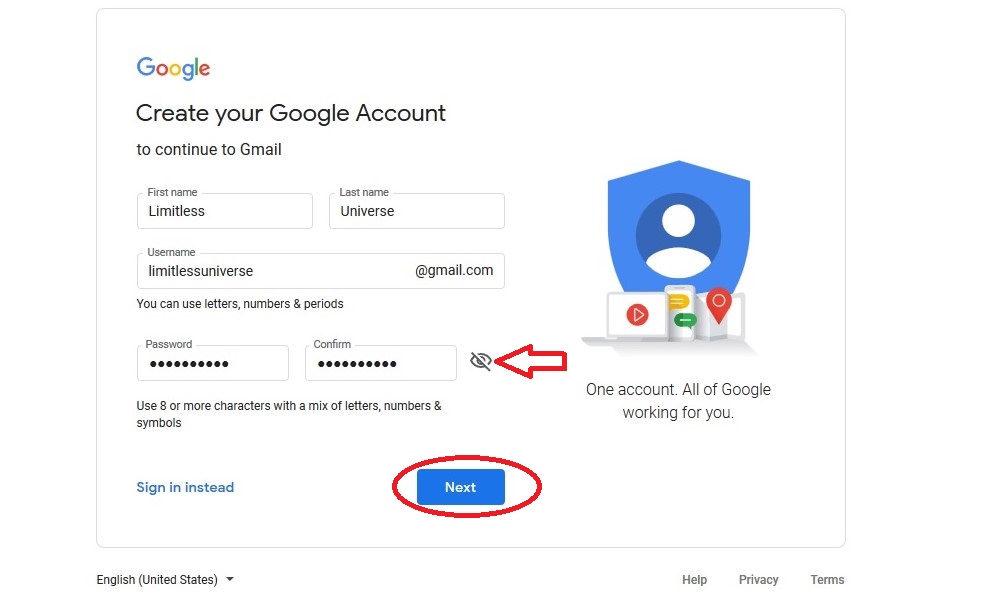 b) Once you are typing your password, you may need to see if the characters you type are the same as the ones which are written. To check this click on the eye icon as shown in the picture above, and then the characters will be shown as displayed below. Remember to click Next to go to the next page.
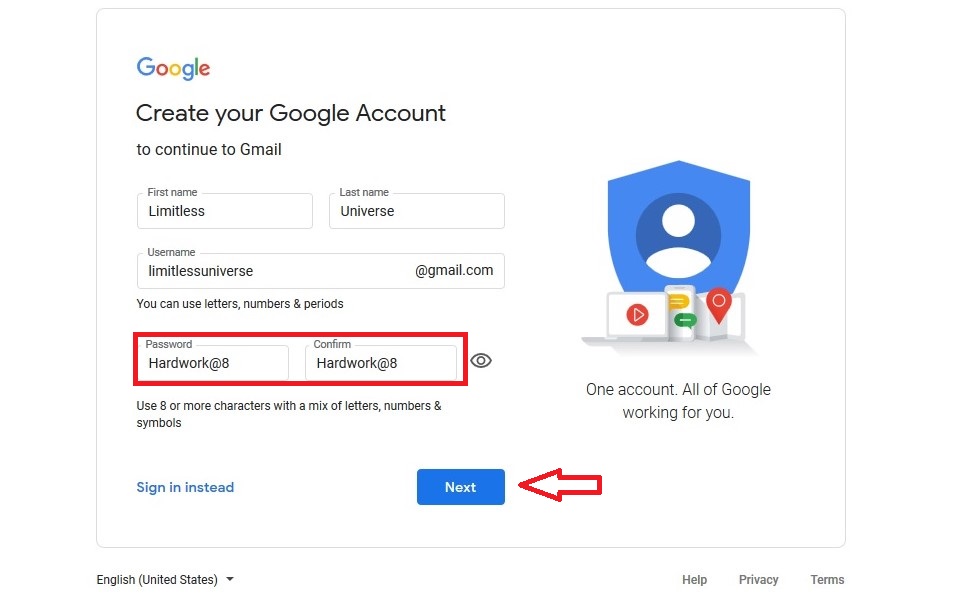 c) Sometimes, the email address you choose to use could have been taken by another person as in the case below. At this time, they suggest you choose among the emails which have not been taken. Therefore, you can choose one of them or add some changes as long as it becomes unique.
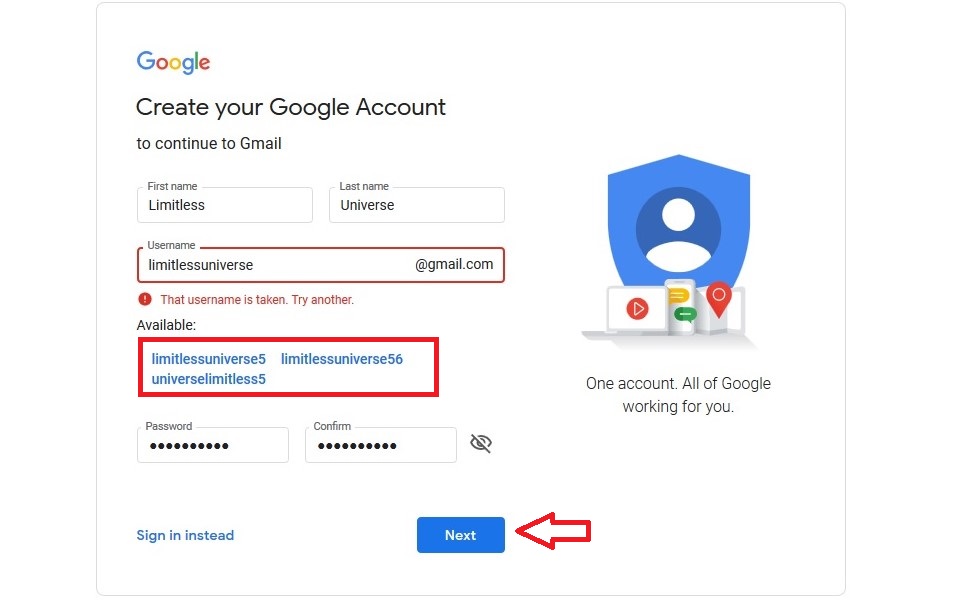
By here, we have chosen to use one of the suggested email addresses/usernames as it is highlighted in the following picture.
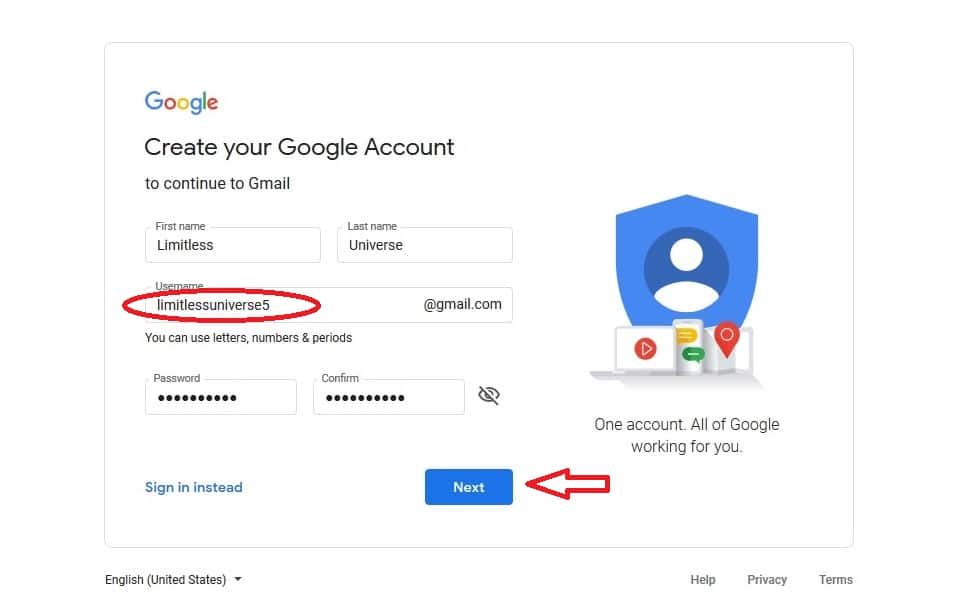 STEP 4: The next page will require you to provide your phone number for verification and security purposes. Before writing your number, make sure that the country code matches with yours. Make sure that you use your phone number as this number can be used in the future once your account needs to be recovered.
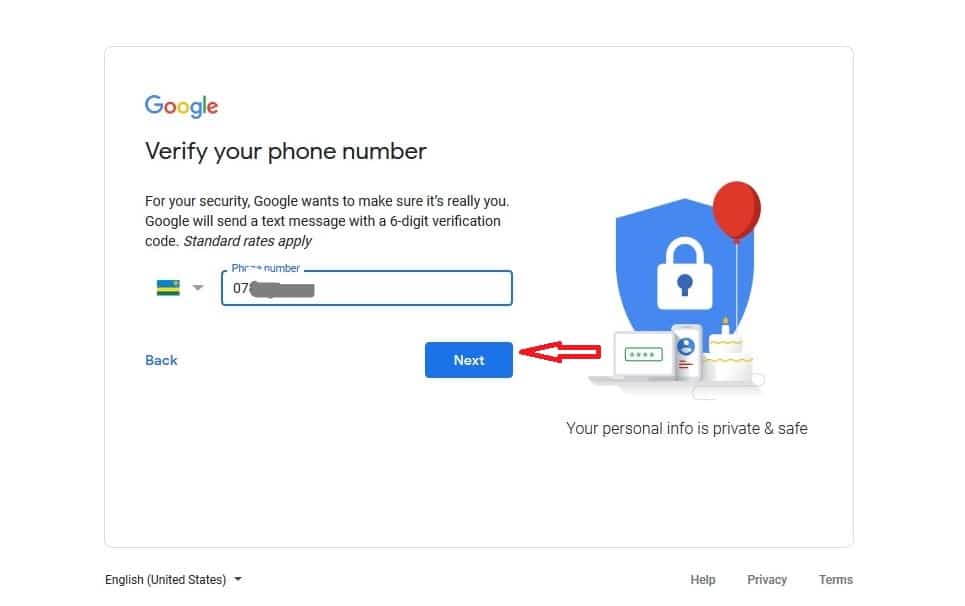 STEP 5: After that, the verification code of six digits will be sent to your phone. Type them in the provided place. If you don’t get it, check if the number you’ve written or the country code are correct. When you find that there is no mistake, check if your phone has sufficient network signals. The problem could also be that the phone memory is full and can’t receive messages. Once you find that all those possibilities are perfect, you can click on Call instead to receive a call that tells you a verification code.
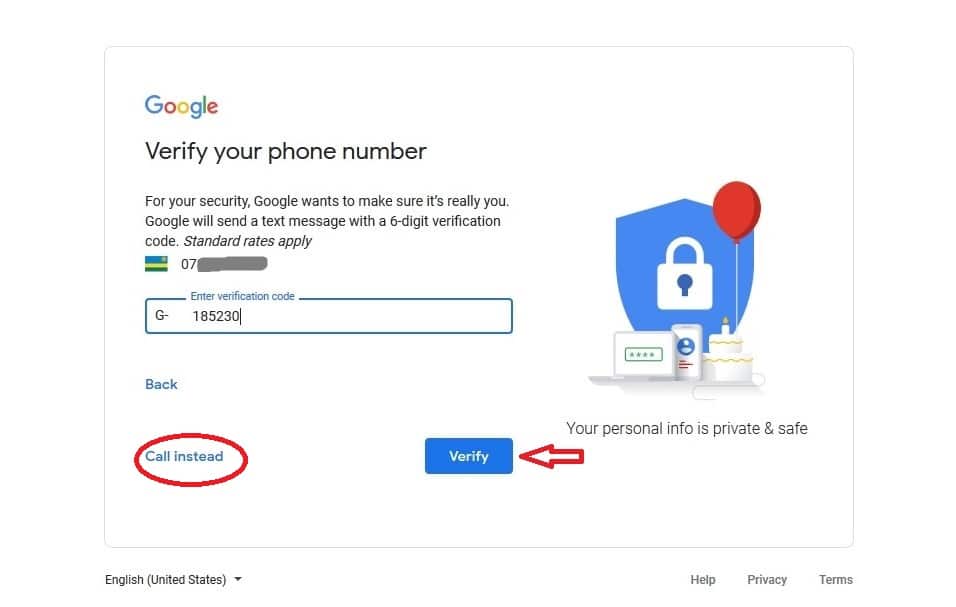 STEP 6: After entering a verification code, the next page will ask you to provide another email for recovery once your account has some security problems. This one is optional (you can do it or leave it). You will also select your birthday (month, day, and year) and gender before leaving the page.
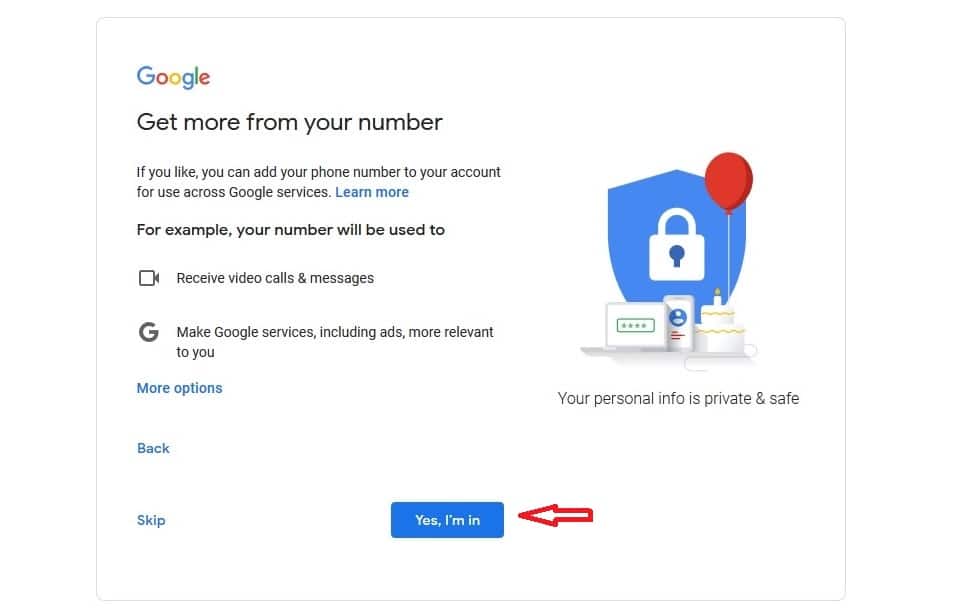
 STEP 7: On the following page, you will choose to skip or to accept depending on your choice.
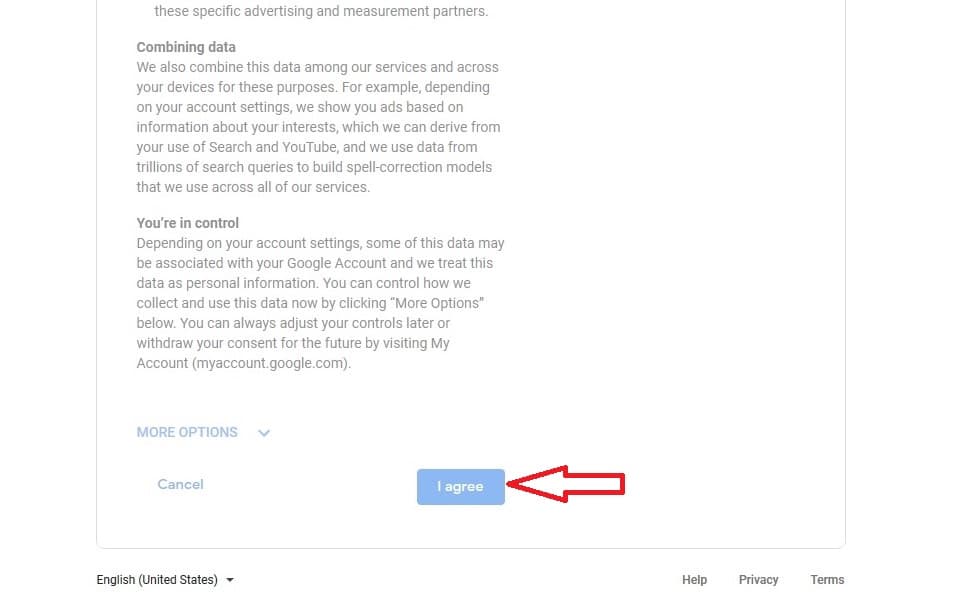
 STEP 8: The next page will show you the terms of services that you need to agree to. Read them before confirming. When you finish reading them, click on Agree to finish the creation of your Google account.
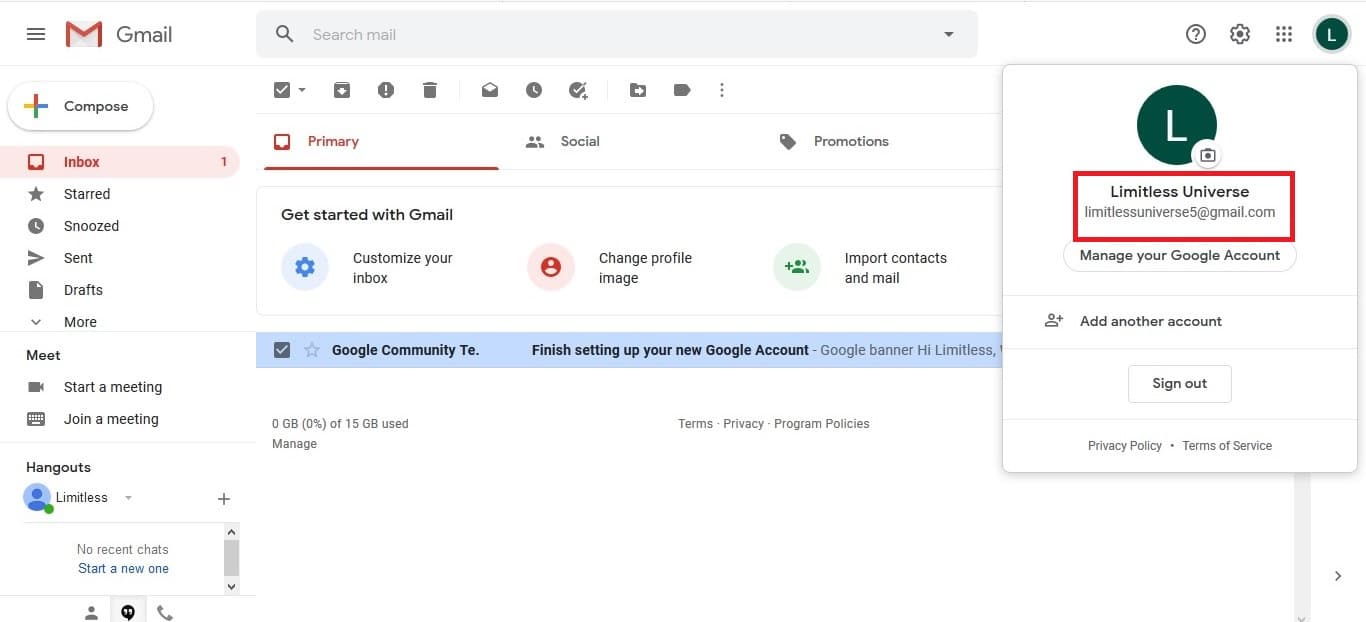
 STEP 9: When you click on Agree, you arrive at this page. Congratulations, you have created your Gmail account. This means that you can send and receive emails. By here, you can also customize your account as you want. If you want, you can upload a profile picture or manage your account by passing on the shown spot, in the right-hand corner.
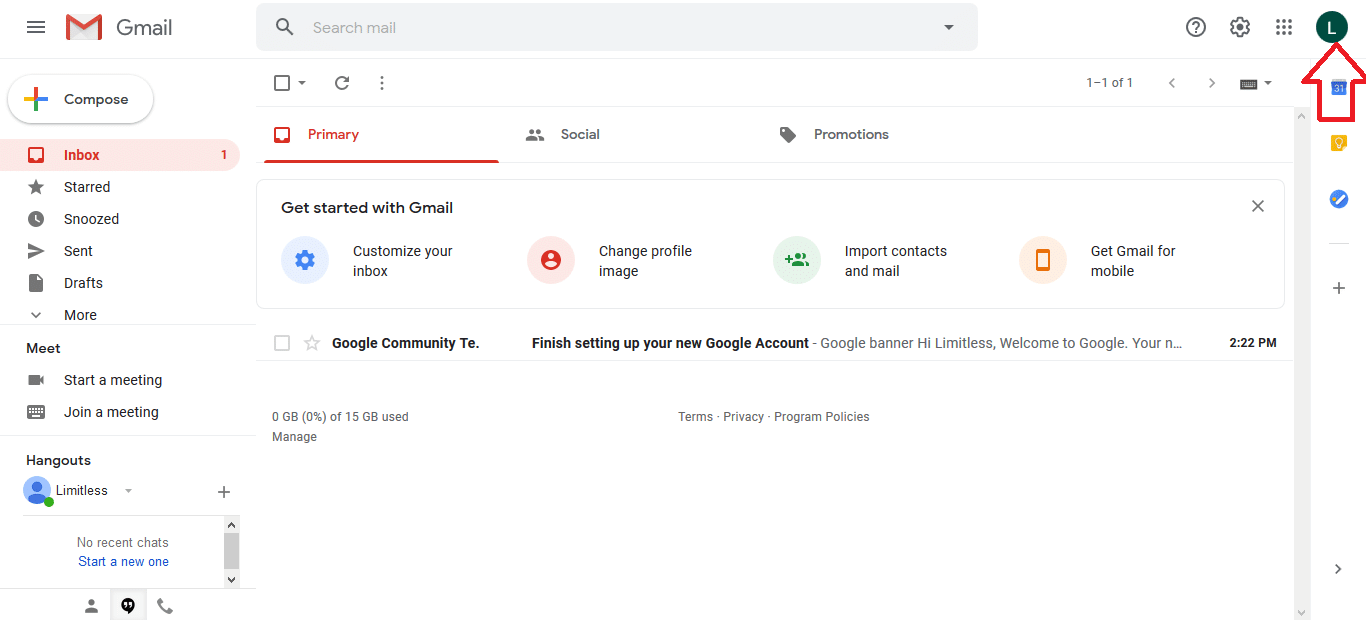 Once you click there, the new window will be opened. It will show the option of changing the profile picture, managing your account, adding another account, and signing out.
Signing in/logging in Gmail account
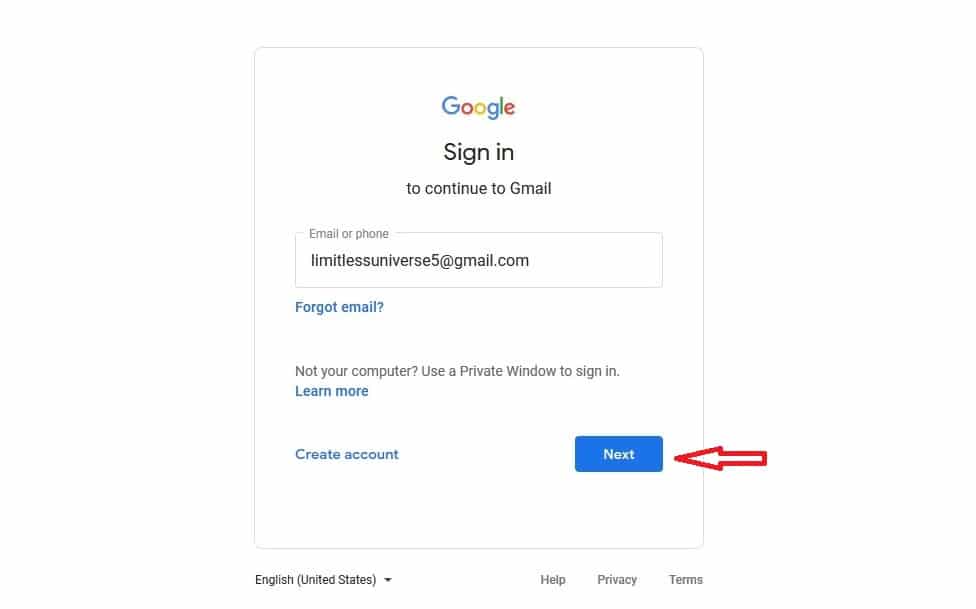
STEP 1: In the next time when need to sign in/log in to your account, you will type your email address in the provided place and then click on Next.
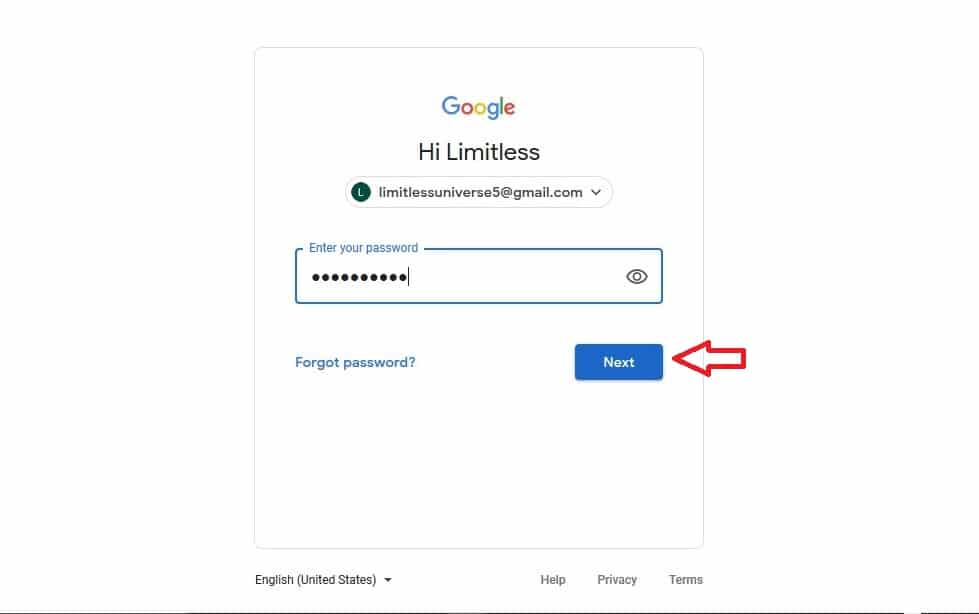
STEP 2: The second page will come with the option of entering a password. After doing that, click on Next.
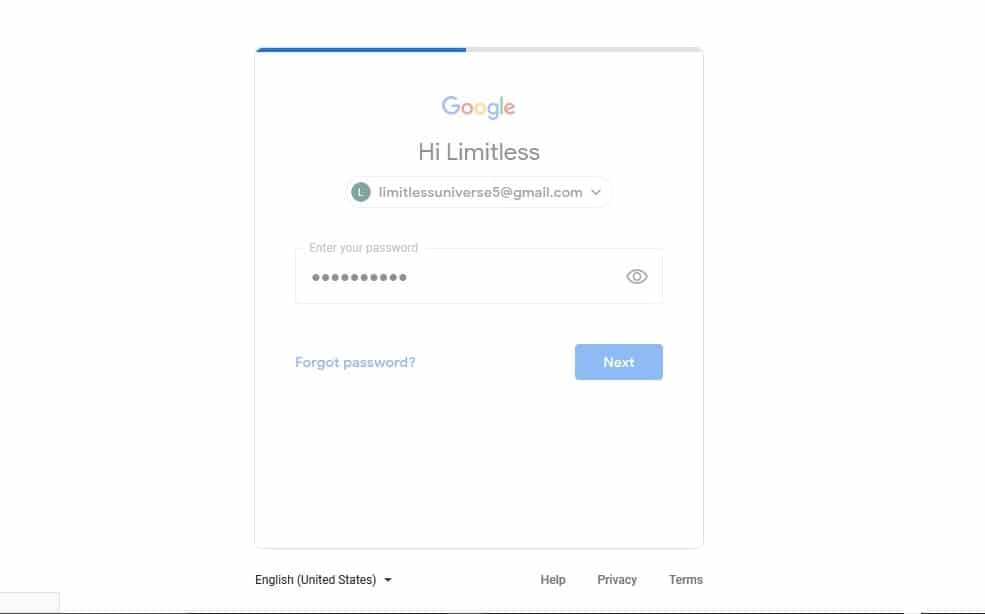
 While loading, they can ask you to save the password. If you are using someone’s device, it is not good to save the password because the next time another person can access your account through the same browser. When you are using your device, you can choose to save the password in the browser so that in the future; you can automatically sign in without entering a password.
 After choosing to save or do not save the password, you access your Gmail account interface. Once you are there, you can create and send emails or check for new emails, among others.

You can also watch this video.
That’s all. We think that this guide has helped you a lot. This means that you can now create your Google account and sign in without any problems. Please, remember to Subscribe to our YouTube Channel for more tutorial videos and follow us on Facebook, Twitter, LinkedIn, and Instagram.
Good updates!